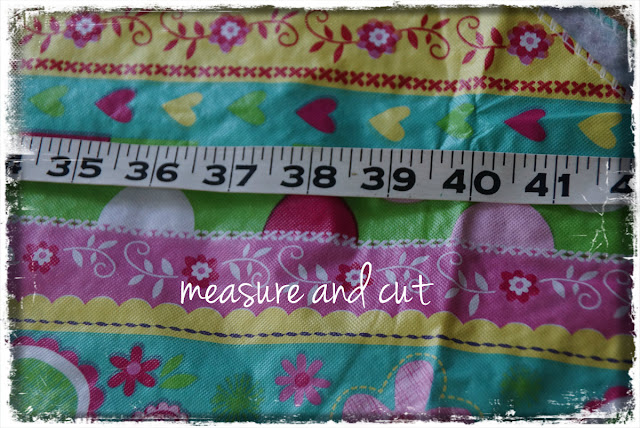
I started with a flannel backed plastic tablecloth.
I loved the colorful, cottagey print!
There are several steps but if you have basic sewing skills you can do it easily!
Set one piece aside. Fold one piece in half lengthwise with the flannel sides together.
Put it inside the bag to check the fit. Trim the end if needed to make it fit nicely,
and sew the two ends together making a circle.
Mark the spot where it folds crosswise and then unfold it.
Each half of this long piece is one pocket side of your insert.
Cut it in half crosswise where you marked it.
Sew around the three open sides of the small pieces.
I used a zigzag stitch.
Using the side seam of the large circular piece as a guide, attach each pocket piece to either side of the side seam.
This is your starting point for making a set of pockets.
Once attached, flatten out the large piece with the two pocket pieces inside and mark where the opposite side of each pocket piece should attach.
The pocket pieces are just a tiny bit larger but attach the sides anyway, the excess will be used up in a minute
Don’t attach the bottom edge of the pocket piece yet. Mark where you want pockets and sew from the top to the bottom at each mark you make. The bottoms will be open.
I made two large pockets on one side to hold books and magazines and four smaller pockets on the opposite side.
When you’ve sewn each pocket “sleeve” then sew the bottom closed….
if there is excess fabric, just make some small pleats….
it will just make your pockets more full at the bottom which allows things that are larger, like bottles, to fit better!
Here I’m putting it in the bag to check where the ties go … see the stitching for the pockets?
Add your ties which will go around the bag handles to hold the insert in place. Two ties for each handle so you can make a bow or knot.
This took about an hour…a nice Summer project!
I’m all ready for our first Beach Day…..
I know, it’s July already but we’ve all been busy!
I think it came out really cute……
don’t you?
Sharing with
Embracing Change
Beyond The Picket Fence
Boogieboard Cottage


 I'm Lorraine. I have a love for home & design and I enjoy sharing that passion with others. I'm so glad you're here to join me.
email: missflibbertigibbet@gmail.com


Brilliant. What a splendid idea!!!
That’s so cute, and functional. I wish I had more time to sew.
Im always loosing things in my beach bag. This is a wonderful idea. Thanks for posting.
Have a safe and happy 4th
Look at you, all organized and everything, Lorraine! : ) I can so sympathize with everything getting thrown in there, scratched sunglasses, books/magazines getting bent up and drinks falling over. I love that you used a vinyl tablecloth to make your insert. I think it will work great for you. I just bought one of those plastic totes {Christmas Tree Shop, I think} and use that for when we go to our condo’s pool. It’s the perfect size for my towel, lotion, bottle of water and a couple of other things. Haven’t brought a book or magazine yet because each time I’ve gone the daughter and granddaughter are with me. There’s no reading when grandchildren are around {and awake!}.
I love this!! So pretty and stylish too.
((Hugs))
Anne
So cute. Love that tablecloth! Perfect for the beach.
Great idea, Lorraine. I need to start sewing again. You come up with the best projects.
I thought I commented on this last night from my ipad while sweating in bed. I see I did not. It’s cute, I’m hot.
~Bliss~
Perfect solution for the black hole! Very smart to use the plastic tablecloth.
Is there room for binoculars? You never know when a hot guy is going to stroll out of the surf.
It’s best to be prepared.
Tina recently posted…Painting Upholstery w/ASCP- My Little Chair and Friends
That is very, very cute and I love that it is not only a great idea but I LOVE the summery colors of it, too! xo Diana
Nana Diana recently posted…FIREKING FINDS , BELLEEK BEAUTIES, LOVELY LIMOGES
It’s still holding up well this year! It really is a cute idea…I looked in on Wednesday and almost said, “ohhh love the inside of your bag and then I remembered I’d seen it before!”
I do think it came out really cute! Makes me wish I wasn’t so afraid of my sewing machine! Also makes me wish I lived near a beach!
Danni@SiloHillFarm recently posted…PEACH GRANITA
This is really cute! I wish I had a sewing machine but then I’d have to learn how to sew! Great bag!!~~Angela
Angela recently posted…Summer Porch!
That’s brilliant I’m doing this, pinned!
Mel recently posted…Balloon Balls.
I think your insert is sooooooo cute but I think it would be even cuter if you had made a solid color outer bag to put your insert into. I just think the drab outer bag just takes away the cuteness of your insert but I LOVE THE INSERT AND I HAVE TO GIVE YOU 2 THUMBS UP AND 9.5 STARS (the solid color outer bag would have made my 9.5 stars go up to a 10+ stars).
GREAT IDEA AND GREAT WELL DONE JOB. THANKS FOR THE IDEA AND INSTRUCTIONS. THIS WOULD ALSO MAKE A GREAT BABY BAG CARRY ALONG INSTEAD OF THE WHOLE BIG DIAPER BAG.